
Heliomotion solar tracker questions
The tracker has an integrated GPS module used to determine the local time, date, latitude and longitude. Using this information the tracker calculates the sun’s position in the sky in order to follow it.
Solar tracking increases energy yield by 25-50% per year, compared with a stationary panel facing south with an ideal tilt. The energy increase depends on the latitude where the installation is located, from +25% at the northern equinox to +50% in Scandinavia. The extra energy is generated in the morning and in the evening which matches the consumption curve of a typical household much more efficiently than a static system which peaks at solar noon – often when everyone is out of the house.
The solar tracker can be powered from any constant 24 VDC power source, either using the included 24 VDC power adapter or by connecting it to a 24 VDC battery bank. The permitted input voltage range is 10-28 VDC. Average power consumption is 0.4 watt (0.01kWh/day).
All Heliomotion models are engineered to withstand wind loads up to 35 meters per second – equivalent to 80 miles per hour. Should expected wind speed surpass 30 m/s (70 mph), it is recommended that you turn off the tracker and use the provided extension rod to tilt the panels horizontally. This will reduce wear and protect the installation until the storm has passed, as this is the optimum position for the installation to resist high wind loads.
If wind speeds are expected to go above 35 m/s (80 mph) it’s recommended to remove the panels and move them to safety. This is fairly straightforward and the panels can be put back when the hurricane has passed. Do not attempt to remove the panels if it’s already windy outside. PV-6 units in the field have withstood wind speeds up to 40 m/s, but we do not recommend making installations where such wind speeds are common.
A wind sensor is being developed as an optional add-on. This will provide wind speed and direction data to a Heliomotion, allowing the unit to automatically turn away from the wind in stormy weather to reduce wear. Please contact us if you would like to be informed on the development of this feature.
In a snowy climate, the foundation column should be at least 1 metre above ground level to prevent the tracker from getting stuck in the snow during winter. As the panels are at a steep angle in the tracker’s morning and evening positions, most snow falls off the unit and there is usually no need to remove the snow manually. As an added safety feature, the tracker will pause tracking if it is unable to move, for example due to excessive snow or vegetation blocking its path. Remove the obstacles and the tracker will automatically resume normal operation within a few hours.
Yes. Keep in mind that in dry regions it may be necessary to wash the panels every couple of months to prevent dust and sand from building up on the panels. In regions with rain, the solar panels are typically self-cleaning and do not require additional attention.
The tracker is designed to work without any reconfiguration. For service purposes the tool Heliocom can be used to communicate with the tracker. See the Heliocom section on the Support page to download this tool.
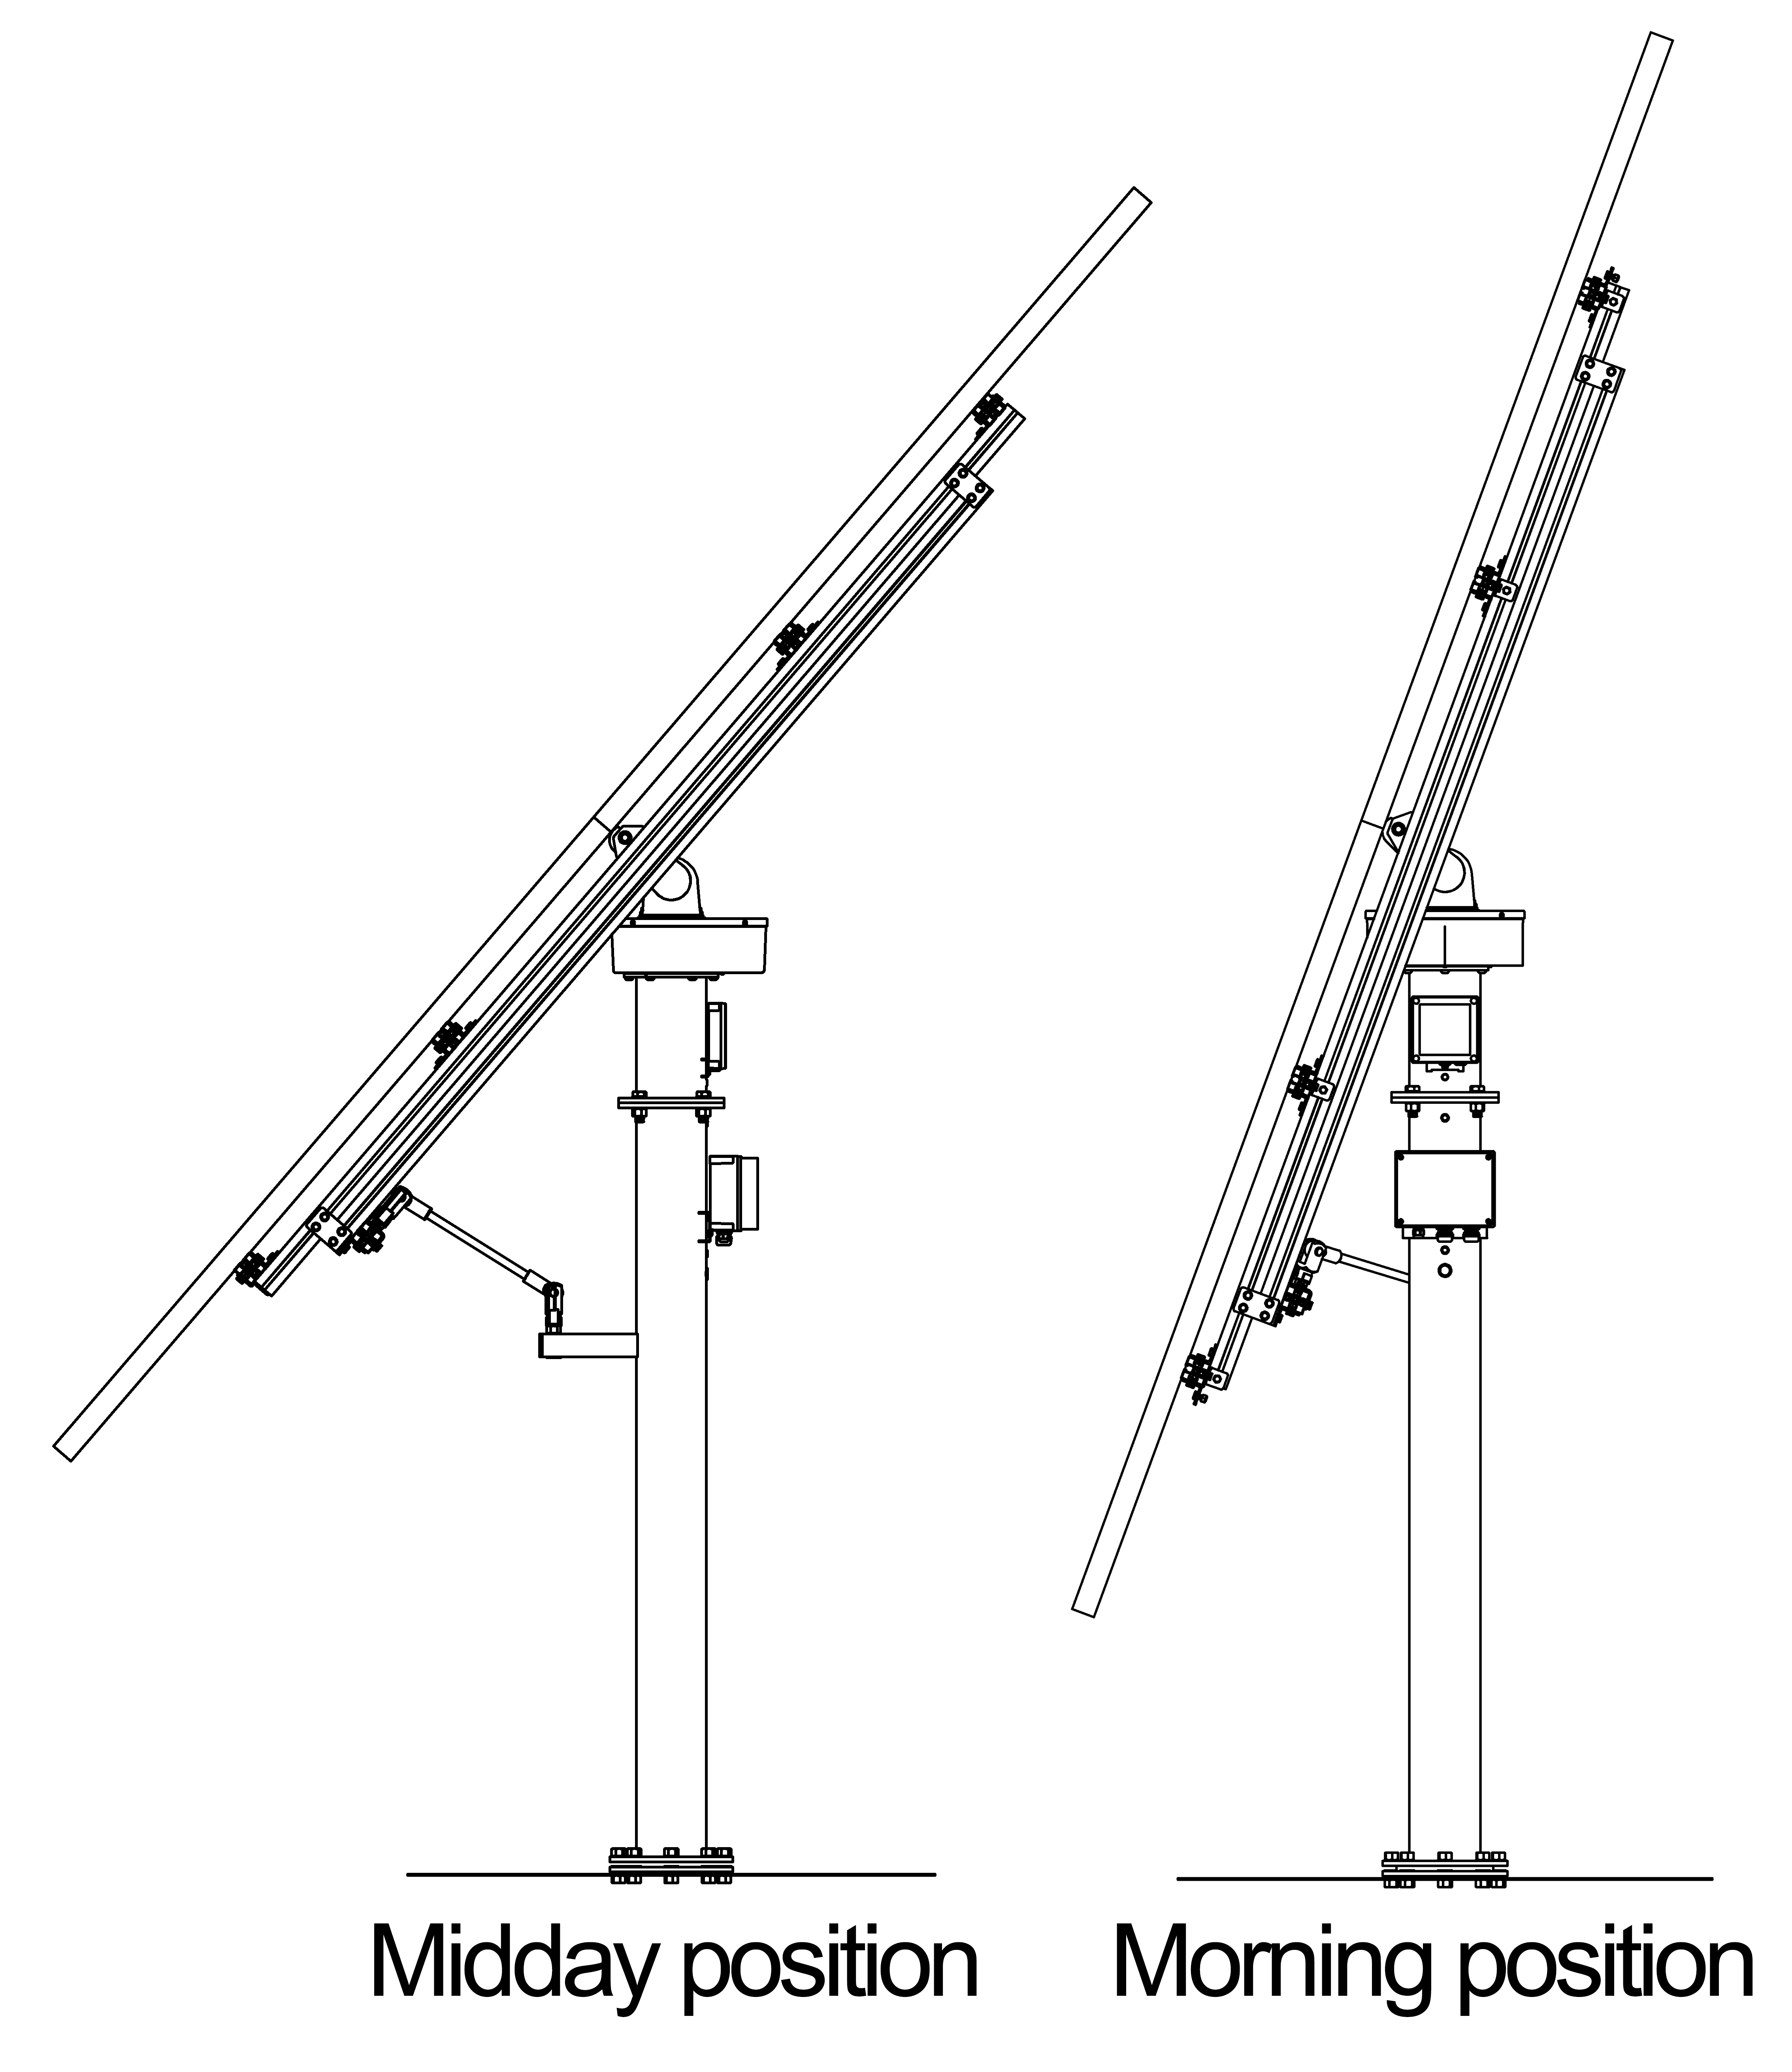
Heliomotion uses a rod that automatically tilts the panels over the course of the day, giving a sinus approximation of the sun’s height angle. In morning/evening position the tilt starts at 20 degrees from the vertical plane. In south position the tilt is dependent on the latitude where the unit is installed. For instance, in London (latitude 50°) the tilt in the south position is 40° to get the best angle towards the sun over the course of the whole year.
Power plant system questions
The Heliomotion tracker is designed to last for as long as the panels last, typically 25-40 years. We give a 5 year warranty to provide free replacement parts. The warranty appears on the last page of the Heliomotion manual.
We recommend the power plant is placed within 100 meters of where the power will be used. The cable size can be adjusted to keep transmission losses low between the power plant and the house. A cable with 2.5mm2 thick wires is suitable for distances up to 40 meters, whereas a cable with 6mm2 thick wires is recommended for longer distances up to 100 meters. Required cable dimension is subject to local regulations.
Typically, you want to use a grid-tied system if utility power is available, because it has a lower cost and it allows you to automatically utilize 100% of your produced electricity. The surplus electricity not consumed by your household will be sold to the grid. In the UK, this is the case only if you have the benefit of the FiT or the SEG.
Battery-tied system are most often used for off-grid installations when there is no access to utility power. They can also provide backup power during blackouts and allow a greater proportion of generated solar energy to be consumed within the household. When considering a battery-tied system it’s important to keep in mind that generated solar energy that is not consumed will be discarded when the batteries are full. Therefore, to make full use of a battery-tied solar system it should be paired with reoccurring daily loads, such as a heat pump or an electric vehicle.
Larger backup needs are usually combined with a larger battery bank and a larger Heliomotion. We typically recommend a minimum of 5 kWh for PV-2M/3M, 10 kWh for PV-4M and 15 kWh for PV-6M when using deep cycle lead-acid batteries, and half as much capacity when using LiFePO4 batteries.
We recommend LiFePO4 batteries for offgrid use and daily use. They are the most durable battery technology on the market and have 5 times more cycle-lifetime than premium lead-acid GEL batteries. For backup use deep cycle lead-acid GEL batteries can be more cost effective than LiFePO4.
Most grid-tied inverters are fanless and make virtually no noise. Battery-tied solar stations typically have fans which kick in progressively as the inverter load increases, so it should be placed somewhere where the sound doesn’t bother anyone, such as a garage, a shed or a cabinet.
The solar tracker itself is very silent. Listening carefully right next to the tracker, it makes the sound of a distant cicada every 7 minutes or so when it updates its position.
Yes, but we have transitioned to primarily focusing on electrical installations, as demand for them has been considerably larger. Upon request, we can provide thermal systems under the model names TC-1000 and TC-2000 (TC for thermal collector).
See the product page for a description of the packages. When you order a Heliomotion you can specify what your package should contain. We manufacture solar tracking power plants for both grid-tied and battery-tied applications in different sizes.
We advise against installing the Heliomotion on a roof. A free standing unit on the ground is much easier to install and service.
This depends on whether you have a grid-tied or battery-tied inverter. A grid-tied solar inverter feeds power to the grid and so during a blackout the production is halted until power is restored. A battery-tied solar inverter works independently of the grid and so it will continue to supply power to connected loads even during a blackout.
A battery-tied inverter creates its own local power grid which is independent from the utility’s grid. To make use of this power an electrician needs to connect the power output from the inverter either to new power outlets or to existing power outlets through the building’s main fuse box. Keep in mind that the 1-phase VAC generated by a battery-tied inverter is not synchronized to the utility grid and so cannot be used in combination with the utility grid to power any 3-phase loads.
The GEL battery is durable and has a design life of up to 12 years. Each charge/discharge cycle reduces the maximum capacity of a battery, more so the deeper the cycle is. After 750 cycles that are 50% deep, or 1800 cycles 30% deep, a GEL battery will have lost 20% of its maximum capacity. This is called one service life.
When the capacity has fallen beyond what you are willing to accept, it is time to replace the battery. This is usually after two service life cycles have been consumed. So if the average cycle per day is 30% deep then the battery can be considered exhausted after 3600 cycles or 10 years. Keep in mind that GEL batteries must never be left in a discharged state for any longer periods as that will reduce their maximum capacity.
Heliomotion PV-2 and PV-3 may use any commonly available panel size (up to 2200x1060mm). Heliomotion PV-4 and PV-6 may use panels that are up to 1750mm long and 1060mm wide.
Heliomotion parts, including the column and solar tracker, can be ordered with a coating of either RAL9006 (Silver) or RAL6025 (Fern Green) as the final layer of paint.
If there is a need to apply a second coating of corrosion resistant paint we suggest using spray paint with a matching RAL color.
Heliomotion can be connected to the grid using either multiple microinverters or a single string inverter. When using microinverters two panels connect to each microinverter located directly underneath the panels, and an AC cable runs from the microinverters to the nearest AC fuse box. When using a string inverter all solar panels are typically joined together in series and a DC cable runs from the panels to the string inverter, which in turn is connected to the nearest AC fuse box. The string inverter is often placed indoors.
Use of micro inverters with Heliomotion are recommended for the following reasons:
- Simpler installation – The 24V AC-DC transformer that powers the solar tracker can be placed at the installation site as there is AC available at the site. In contrast, with an indoor string inverter the transformer is typically placed indoors and 2 extra wires are needed in the DC cable that runs to the installation site for carrying the 24VDC. Also, there is no need to install DC breakers when using microinverters.
- Easier placement – No need to find space indoors for mounting the large string inverter. Each microinverter can be mounted directly to the framework behind the solar panels.
- Flexibility – Each microinverter can be connected to the electrical phase where the power is most needed, giving the option of 1-phase, 2-phase or 3-phase systems. In contrast string inverters are either 1-phase or 3-phase with the solar power always divided equally across all 3-phases. Microinverters also allow for 3-phase power output with only 3 panels, whereas string inverters typically requires at least 6 panels to reach the minimum voltage needed to power a 3-phase string inverter.
- Modular – It is easier to expand the installation when using microinverters.
- Inverter redundancy – If a microinverter breaks only the panels connected to that inverter stop generating power, whereas if the string inverter breaks production goes down to zero.
- Panel redundancy – If one of the panels are damaged only output of that panel is reduced, whereas with string inverters it will negatively impact the output of whole panel string.
- Shading – Microinverters optimize each panel individually, in contrast to string inverters where a single shaded panel in the string will have a large impact on solar output.
- Smaller – Microinverters are compact and do not weight a lot compared to string inverters, making them easier to install and transport.
Microinverters are typically not suitable in the following case:
- When using high voltage panels, such as SunPower, as they have a voltage that goes beyond the 22-50 VDC allowed range of most microinverters.
- If logging of production data is desired then string inverters often include this functionality as standard whereas microinverters typically require a separate energy meter (such as OWL Intuition) to log production data.
Microinverters are not ideal in the following case:
- When using solar panels with output ratings greater than the microinverter’s rating.
- When using half-cell solar panels, as their DC cables are typically not long enough to connect to the microinverter without use of extension cables.
There are three options for the foundation: a large hole filled with concrete, anchoring threaded rods to bedrock, or using ground screws. Because the system is bolted to the ground, it means it can be un-bolted and moved to a new property if needed. See assembly guide for instructions on making a concrete or bedrock foundation.
If you prefer to use ground anchors please contact us. Ground anchors require that the person installing them has a specialized tool to drive the anchors into the ground. The anchors are more eco-friendly than using concrete and are quicker to install since there is no need to wait for the concrete to cure.
The area around the foundation column needs to be clear so that the solar tracker can rotate freely without any obstacles. The minimum clearance from the column when using 1.6x1m panels is 1 meter for PV-2, 1.3 meters for PV-3, 1.5 meters for PV-4, and 2 meters for a PV-6. It is strongly recommended to have at least 0.5 meters of extra clearance on all sides to allow for the panels to be tilted horizontally. See the PDF files describing the specific Heliomotion dimensions on the Documents page for more info.
![]()